How to Dub Videos with AI: Complete Step-by-Step Guide
Your best video currently reaches only one language. Dubbing it with AI lets you reuse that same content for completely new audiences—without re‑recording anything.
This guide shows how to dub a video into another language in minutes using Subclip, where you upload a video, verify an AI transcript, and generate a new language voice track and subtitles in one workspace.
Why Dubbing Instead of Just Subtitles?
Subtitles are better than nothing, but they force viewers to read instead of watching. That lowers retention—especially on mobile.
Dubbing gives you:
- Native‑language audio (viewers can listen instead of reading).
- Better completion rates for educational and how‑to content.
- A reusable asset: one recording, multiple language versions.
AI tools now reduce the process to minutes instead of weeks, at a fraction of traditional studio costs.
What Subclip Actually Does Today
Subclip focuses on being a practical dubbing + editing workspace rather than a full studio replacement.
Right now Subclip lets you:
- Upload a video file.
- Auto‑generate a transcript in the original language inside the video editor.
- Translate that transcript and edit it as a verification layer.
- Generate a TTS voice in the target language from the verified script.
- Auto‑generate subtitles in the target language.
- Add custom text overlays and simple media elements.
- Add or swap background music.
- Export the final dubbed video for any platform.
It does not currently offer:
- Voice cloning.
- Advanced AI lip‑sync.
- Direct social posting integrations.
- Paste-and-dub from YouTube or cloud links.
This means your workflow is straightforward: upload a file, edit transcript, dub, export—no external account juggling.
Step-by-Step: Dubbing a Video with Subclip
1. Create a Project and Upload Your Video
Start by creating a new project in Subclip.
- Click "New Project".
- Give it a name (e.g., "Tutorial - Spanish Dub").
- The video editor workspace opens automatically.
Now upload your video file:
- Supported formats: MP4, MOV, WebM, and other common video formats.
- Click the upload button in the editor and select your video file from your computer.
- Wait for the video to process and appear in the timeline (usually under a couple of minutes).
Typical sources for dubbing:
- Recorded YouTube talking‑head video (download, then upload).
- Course lesson.
- Promo or explainer video.
Once your video is in the timeline, you're ready to dub.
2. Open the Dub Button and Auto‑Generate the Transcript
Inside the video editor workspace, you'll see a Dub button.
Click it to:
- Trigger auto speech‑to‑text on your original audio.
- Generate a full transcript with timestamps.
Subclip listens to your video and converts every spoken word into text, mapping it to exact timing points in the video.
Expected time: 30 seconds to 2 minutes depending on video length and audio clarity.
3. Review and Edit the AI Transcript
The transcript is your control surface. If the text is right, the dubbing will be right.
In this step you:
- Fix any transcription errors (names, brands, technical terms).
- Clean filler words if you like (uh, um, half sentences).
- Standardize terminology (e.g., always "sales funnel" not "marketing funnel").
This "verification layer" is what sets Subclip apart from one‑click black‑box tools: you can see and fix exactly what the AI will speak before generating audio.
For multi-minute videos, you don't need to obsess over every word—just scan and correct obvious mistakes.
4. Translate the Transcript into a New Language
Next, you create the target‑language script:
- Choose a target language (e.g., Spanish, Hindi, Portuguese).
- Let Subclip generate a translation from your verified original transcript.
- Review this translated script line‑by‑line.
Even if you don't speak the language, you can:
- Use Google Translate or DeepL in another tab to spot‑check important phrases.
- Ask a native‑speaker friend to review key sections if it's a high‑stakes video.
Because Subclip keeps translation tied to each line of the transcript, any small correction you make reflows directly into the final audio and subtitles.
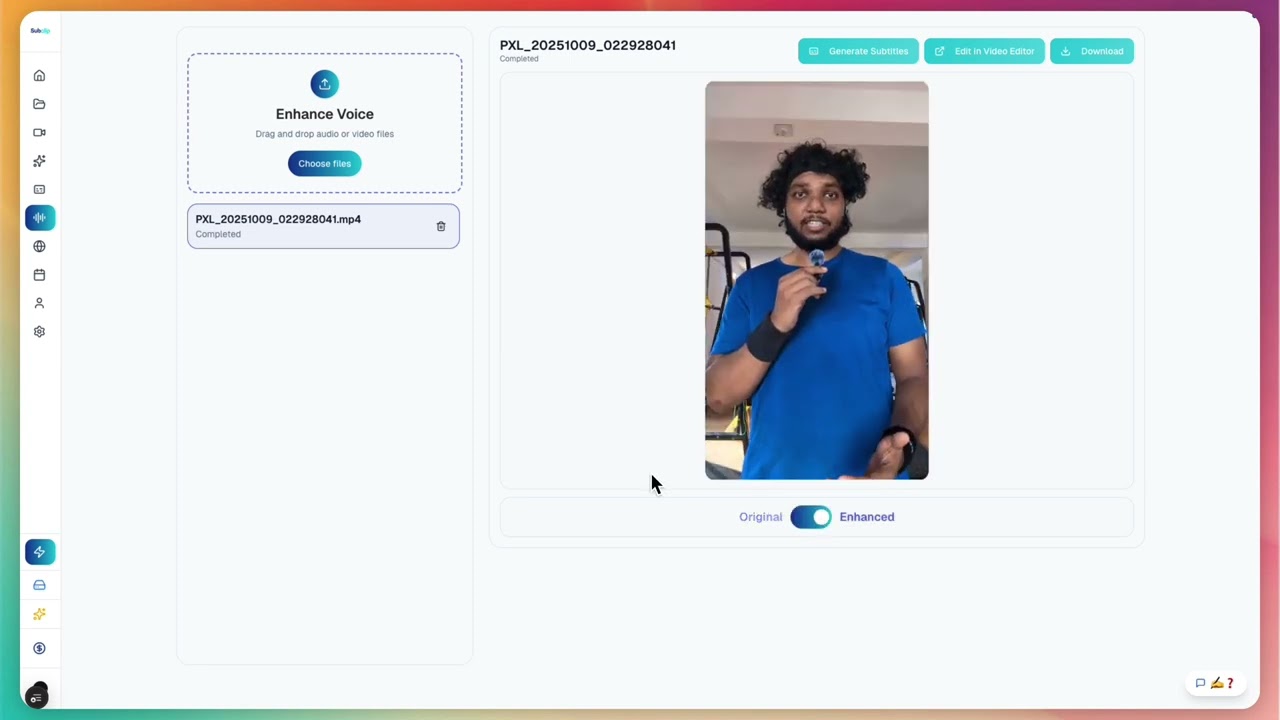
5. Generate the Dubbing Audio (TTS)
Once the translation looks good, you generate the dub:
- Pick a TTS voice in the target language (e.g., neutral male/female in Spanish).
- Click to generate the audio track from the translated, edited transcript.
Under the hood, the AI:
- Reads your verified script.
- Produces a natural‑sounding voiceover in the new language.
Because Subclip is using the exact text you approved, there's no hidden re‑interpretation step. If something sounds off, you go back to that line in the transcript, tweak the text, and regenerate only that segment.
Note: there is no advanced lip‑sync right now—Subclip aims for general timing alignment but doesn't promise frame‑perfect mouth matching. That's okay for:
- Talking‑head educational content.
- Screen‑recordings and tutorials.
- Slides / faceless videos.
6. Auto‑Generate Subtitles and Add On‑Video Text
To make your dubbed version more accessible and "scroll‑proof":
- Use Subclip's subtitle generation from the same target‑language script.
- Burn subtitles into the video or export as a separate SRT/VTT file.
You can also:
- Add custom text overlays (titles, lower‑thirds, section labels).
- Overlay explanatory text in the target language to reinforce key points.
This is particularly effective for educational clips where many people watch without sound.
7. Add Background Music and Media Elements (Optional)
If you want the output to feel more produced:
- Add or swap background music so it doesn't overpower the TTS voice.
- Add simple media elements (logos, images).
Good practice:
- Keep music volume low under speech.
- Avoid lyrics under voice; instrumental tracks work best.
8. Export and Upload to Your Platforms
Right now Subclip focuses on clean export, not posting automation.
You can:
- Export the final dubbed video file (MP4 at your desired resolution).
- Export subtitles separately if your platform prefers closed captions.
Then you upload manually to:
- YouTube (as a separate language video or in a language‑specific playlist).
- Your course platform (Teachable, Thinkific, etc.).
- Social platforms (Reels, Shorts, TikTok) after trimming if needed.
Manual upload adds one extra step, but it keeps your stack simple and avoids fragile API integrations.
Real Example: English → Spanish in 10 Minutes
Say you're an educator with a 12-minute tutorial on "How to Start an Online Business."
Step 1: Create project and upload (2 minutes)
- Click "New Project"
- Name it "Business Tutorial - Spanish"
- Upload your MP4 file from your computer
- Video appears in timeline
Step 2: Click Dub, get transcript (2 minutes)
- Click the Dub button
- AI transcribes your English audio automatically
Step 3: Review transcript (3 minutes)
- Scan the transcript for errors
- Fix 2–3 mistakes (AI usually gets 95%+ right)
- Approve
Step 4: Translate to Spanish (2 minutes)
- Select "Spanish" as target language
- Review the Spanish translation (should look natural)
- Approve
Step 5: Generate Spanish audio (1 minute)
- Click "Generate Audio"
- AI creates a Spanish voiceover from your verified script
Step 6: Add subtitles and export (1 minute)
- Auto-generate Spanish subtitles
- Export as MP4
- Done
Total time: 11 minutes
Compare to traditional dubbing:
- Hire voice actor: 2 weeks
- Book studio time: 1 week
- Edit and sync: 1–2 weeks
- Review: 1 week
- Total: 1–2 months
- Cost: $2,000–5,000
With Subclip: 11 minutes, $0 on free trial or $5–29 on paid plans.
How Subclip Compares to Other Tools
When comparing Subclip to other video dubbing tools, several key features stand out:
Upload Video File: Subclip allows users to easily upload their video files, a feature that is also available in HeyGen, Veed, and Synthesia.
Editable Transcript Layer: Subclip offers an editable transcript layer, enabling users to verify and edit their transcripts directly. This feature is not available in HeyGen, Veed, or Synthesia.
Free Plan: Subclip provides a free plan that allows for five videos per month, while HeyGen offers three videos per month, Veed has a limited 14-day trial, and Synthesia does not have a free plan.
Languages Supported: Subclip supports dubbing in over 21 languages. In comparison, HeyGen supports 40+ languages, Veed offers 20+, and Synthesia excels with 120+ languages.
Subtitles: Subclip, along with HeyGen, Veed, and Synthesia, includes subtitle generation as part of its capabilities.
Custom Text Overlays: Subclip allows for custom text overlays, whereas HeyGen, Veed, and Synthesia do not.
Voice Cloning: While Subclip does not offer voice cloning, HeyGen and Synthesia do.
Ease of Use: Subclip is rated highly for ease of use, with a score of 9 out of 10. HeyGen follows with a score of 8, and Veed scores 6.
Pricing: Subclip is competitively priced at $14 per month. In contrast, HeyGen's pricing ranges from $19 to $99 per month, Veed ranges from $8 to $55, and Synthesia's pricing varies from $30 to $200 per month.
Subclip's sweet spot lies in serving creators who desire full control through an editable transcript without the burden of paying for advanced features they may not use. While HeyGen may be a better option for those needing avatars and Synthesia caters to enterprise-level needs, Subclip offers the simplest solution for users who want to "upload, dub, export" without unnecessary complexity.
Common Mistakes to Avoid
Mistake 1: Skipping the Transcript Review
If the original transcript has errors, the translation will too. Always spend 2–3 minutes reviewing before proceeding.
Fix: Read through the transcript, fix obvious mistakes (AI usually gets names, brands wrong).
Mistake 2: Dubbing Low-Quality Source Audio
If your original audio is noisy or muffled, the transcript will be messy, and the translation will suffer.
Fix: Before uploading, listen through headphones. If you can't understand it clearly, clean it up or re-record.
Mistake 3: Not Reviewing the Translation
Even at 95%+ accuracy, you'll sometimes get:
- Wrong terminology (idioms don't translate literally).
- Cultural mismatches.
- Unclear phrasing in the target language.
Fix: Spend 5 minutes reviewing the target-language transcript. Use Google Translate to spot-check important phrases.
Mistake 4: Uploading a Super Long Video Without Testing
If you have a 3-hour course, test with one 15-minute module first. Make sure the workflow works for you before dubbing everything.
Fix: Start small (under 15 minutes). Build confidence, then scale.
Mistake 5: Forgetting to Download and Promote
You dub a video into Spanish and export it. Then what? You don't tell anyone.
The platform won't auto-promote your dub. You have to upload it somewhere and tell your audience it exists.
Fix: Upload to YouTube as a separate video (with "Spanish (Español)" in title), or create a language-specific playlist.
FAQ
Q: Do I need to know another language to use this?A: No. You verify the original English transcript, then review the translated script (using Google Translate to spot-check if needed). The AI does the actual translation and voice work.
Q: Can I undo the dubbing?A: Yes. Always keep your original video. The dub is a separate export.
Q: How accurate is the AI translation?A: 95%+ for straightforward content. Technical terms or very specific language might need review, which is why the verification step exists.
Q: Can I use dubbed videos for YouTube monetization?A: Yes. You own the content, and the dub is yours to monetize.
Q: How many languages can I dub into?A: Subclip supports 21+ languages. Start with 2–3 and expand based on which performs best with your audience.
Q: Does Subclip post to YouTube or social media for me?A: No, not yet. You export the video and upload manually to YouTube, Reels, Shorts, or your course platform. This keeps the workflow simple and avoids fragile integrations.
Q: What if the AI gets the translation wrong?A: You edit the transcript line-by-line before generating audio. If you spot an error after audio is generated, you can fix that specific line and regenerate just that section.
Getting Started: Your First Dub
This week:
- Pick your best-performing video (highest views, longest watch time).
- Go to Subclip.app and create a free account (no credit card).
- Create a new project and upload your video.
- Click Dub and review the auto-generated English transcript.
Next week:
- Choose one target language (e.g., Spanish if you have Latino audience, Hindi if you have Indian viewers).
- Translate the transcript and review it (use Google Translate to spot-check).
- Generate the dubbed audio.
- Export the video.
- Upload to YouTube or your platform.
Following week:
- Check analytics (views, engagement, new subscribers in target language).
- If it worked, dub more videos into that language.
- If you want to test another language, repeat with a different video.
Final Thought
Your content is too good to stay in one language.
Every language you add is a new audience. Every new audience is growth.
Ready to reach 10x more viewers? Try Subclip free. Dub your first video in 10 minutes. See what happens.
No credit card required.